Local Version Control
Repository View
Programming exercises use a version control system called Git. Git is a distributed version control system that allows you to track changes in your code. These changes are stored in a repository. A repository is a collection of files and directories that are tracked by Git. How to navigate through the repository and view the code is explained in the following sections. This guide is divided into two parts: one for students and one for instructors. It is demonstrated using course programming exercises, but the same principles apply to exams as well.
Access Repositories as a Student
As a student, you can use the repository to view your course submissions.
To access your submissions, you need to navigate to the exercise, press the ‘Code’ button, and click on 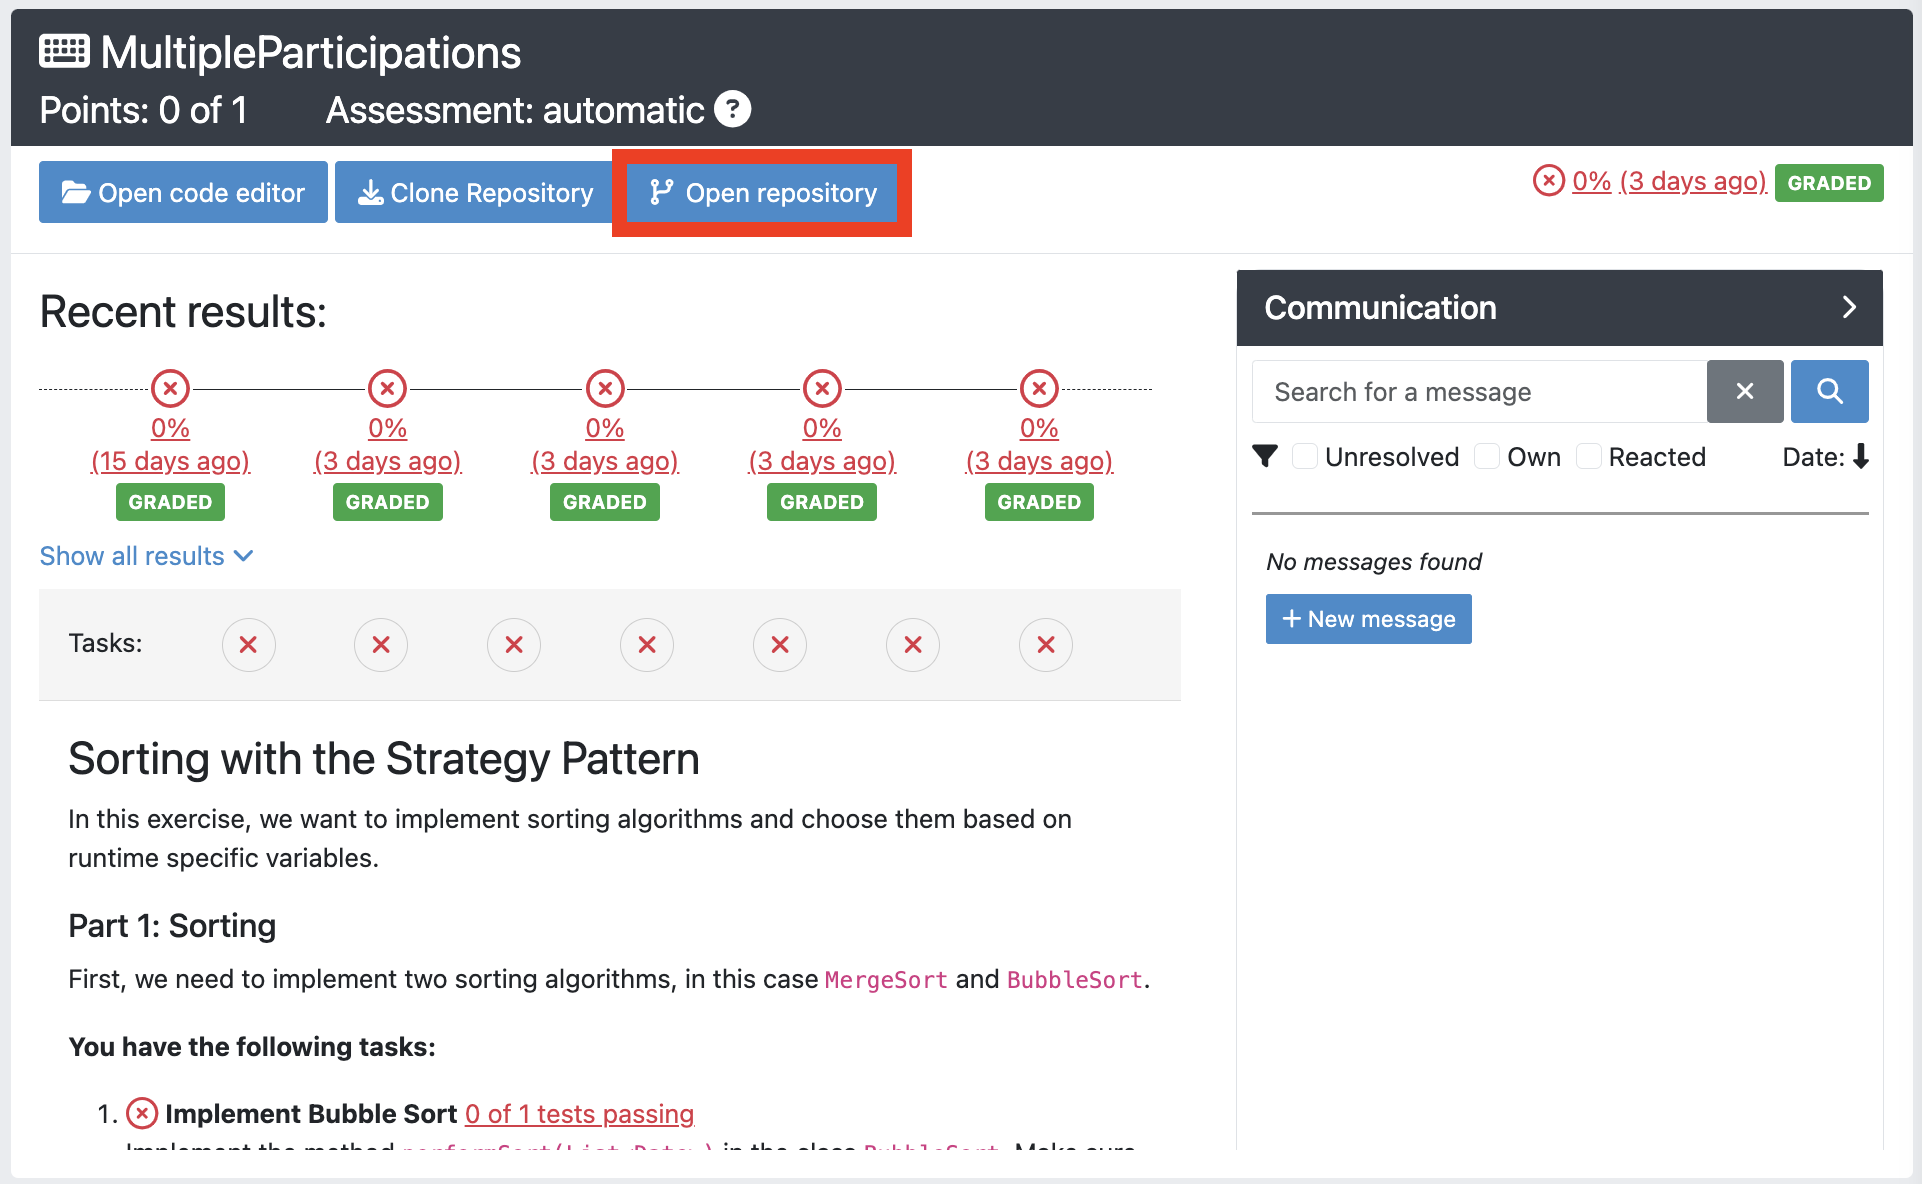 .
.

Opening the repository (student view)
After pressing the button, you will be redirected to the Current Repository Content page of the repository. This view shows the current content of the repository with the latest changes in a read-only code editor. You can view the code, but you cannot edit it. You can also navigate through the whole code by clicking on the file names in the file browser on the left side. To the right side of the screen, above the problem statement, you can see the result of the submission. You can also copy the repository URI by pressing the ‘Code’ button to clone the repository to your local machine and see the full commit history by pressing the ‘Open Commit History’ button. Finally, you can download the repository as a ZIP file by pressing the ‘Download Repository’ button.
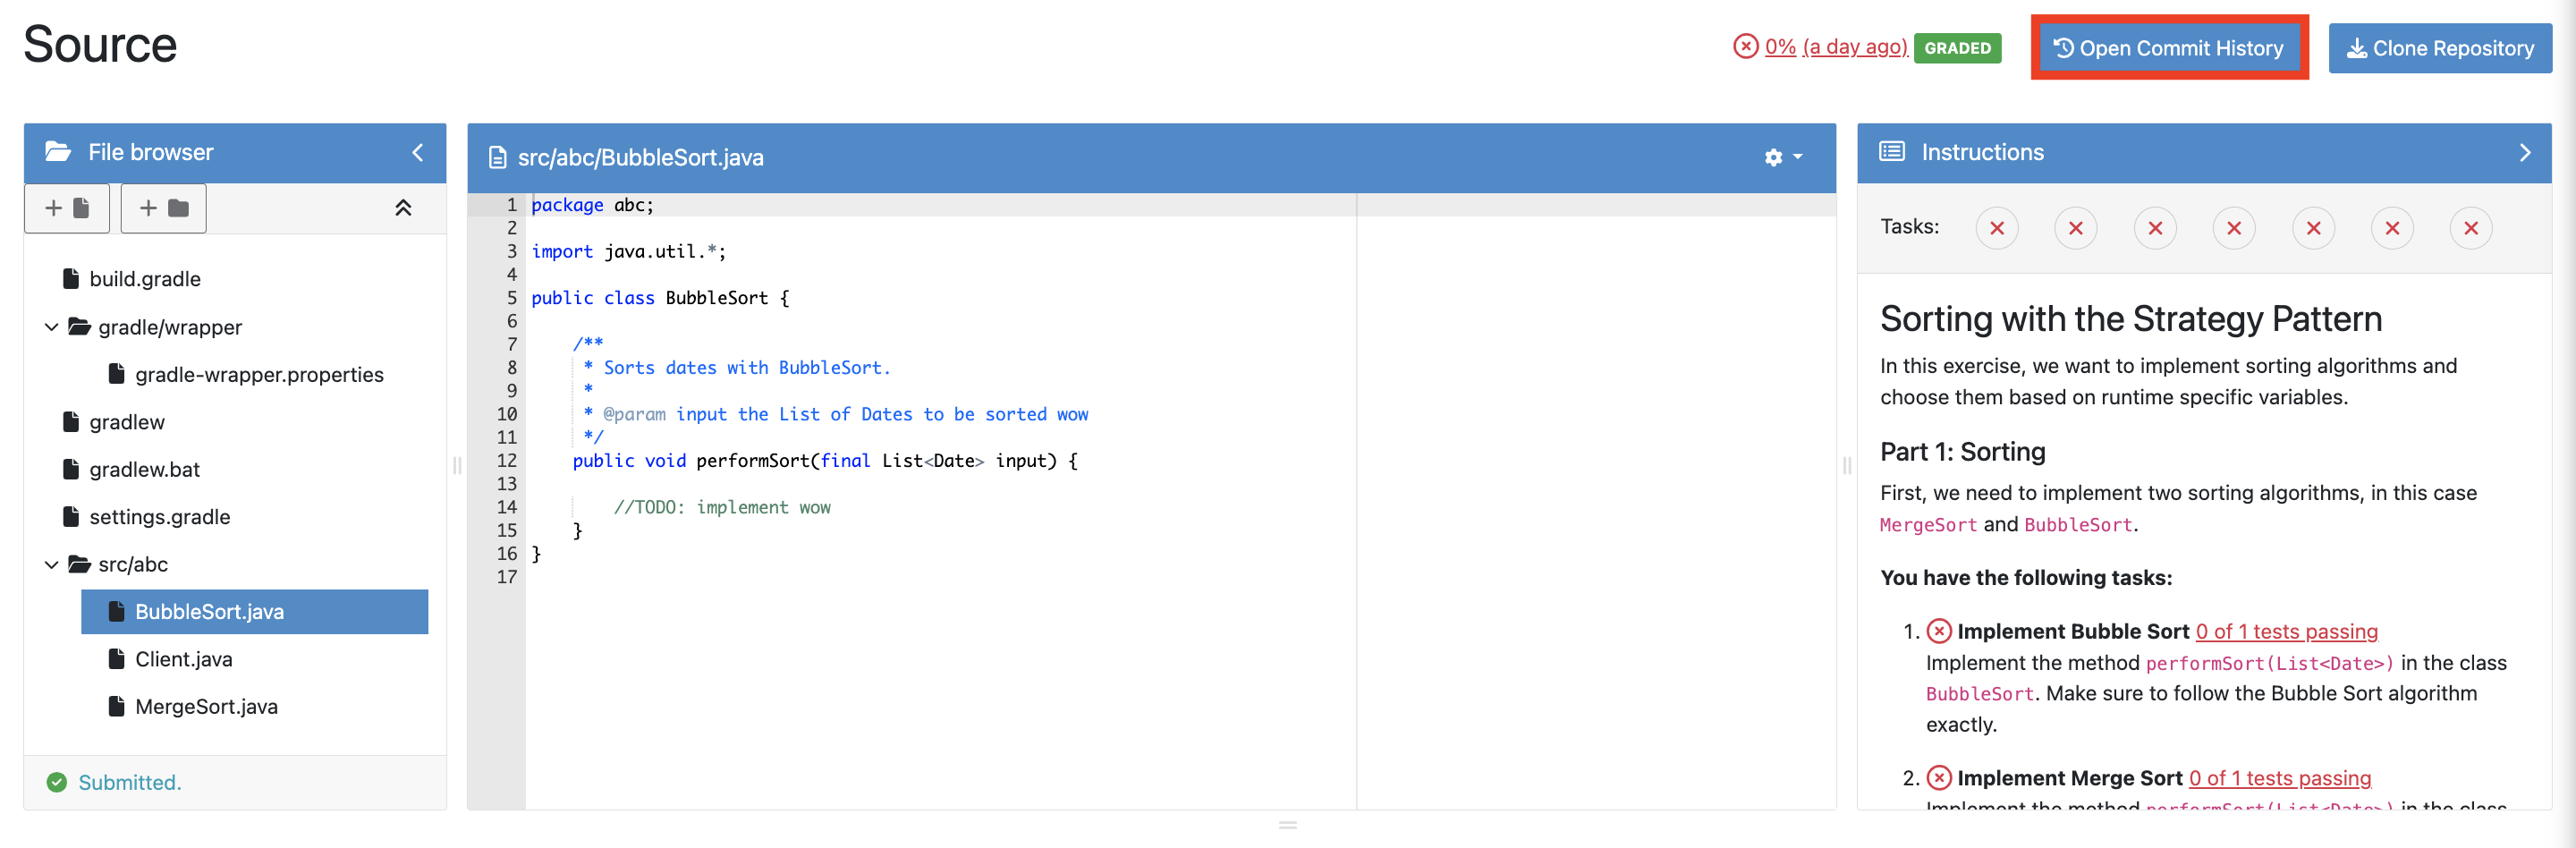
Current Repository Content
The Commit History page shows all the commits that you uploaded to the repository. The commits are ordered from the latest to the oldest. You can see the commit message, the author of the commit, the date of the commit, the commit hash and the result of the commit. If you created a submission with multiple commits, you can see all of them here but only the last commit has the result of the submission. Lastly, you can also view the code of the commit by pressing on the commit hash.
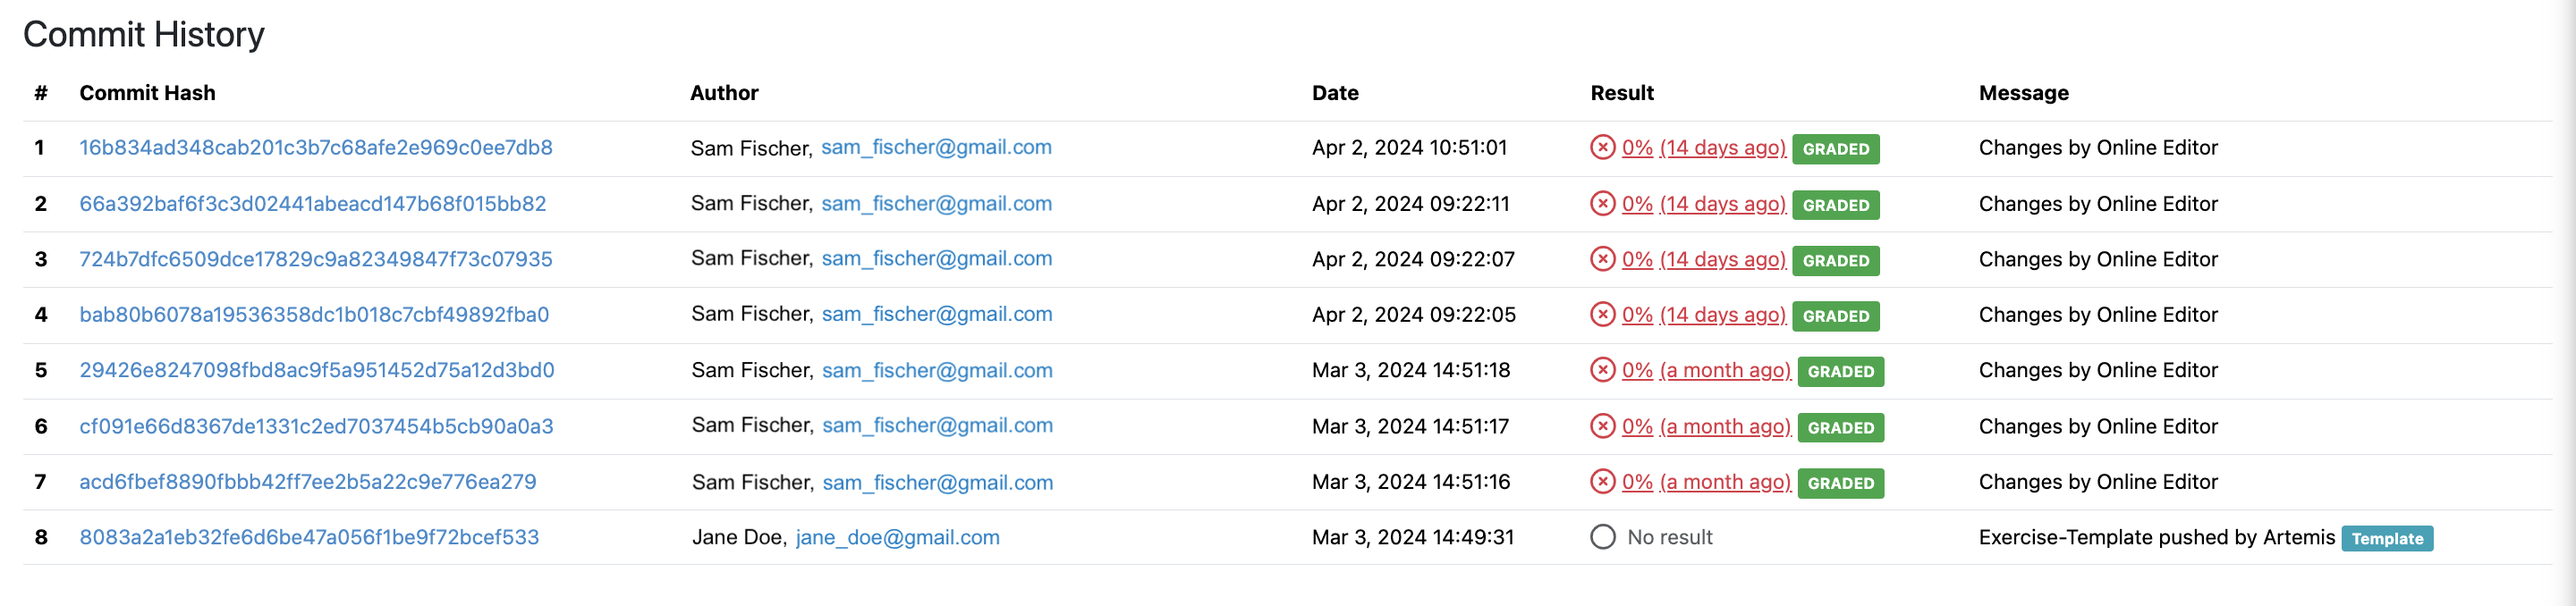
Commit History View
By clicking on a commit hash, you are redirected to the Commit Diff page. This page shows the changes that you made in this commit. You can see the changes in the code, the files that have been added, the files that have been deleted and the files that have been modified. Green color indicates the lines that have been added and red color indicates the lines that have been deleted. You can also see the commit message, the author of the commit, the date of the commit and the commit hash.
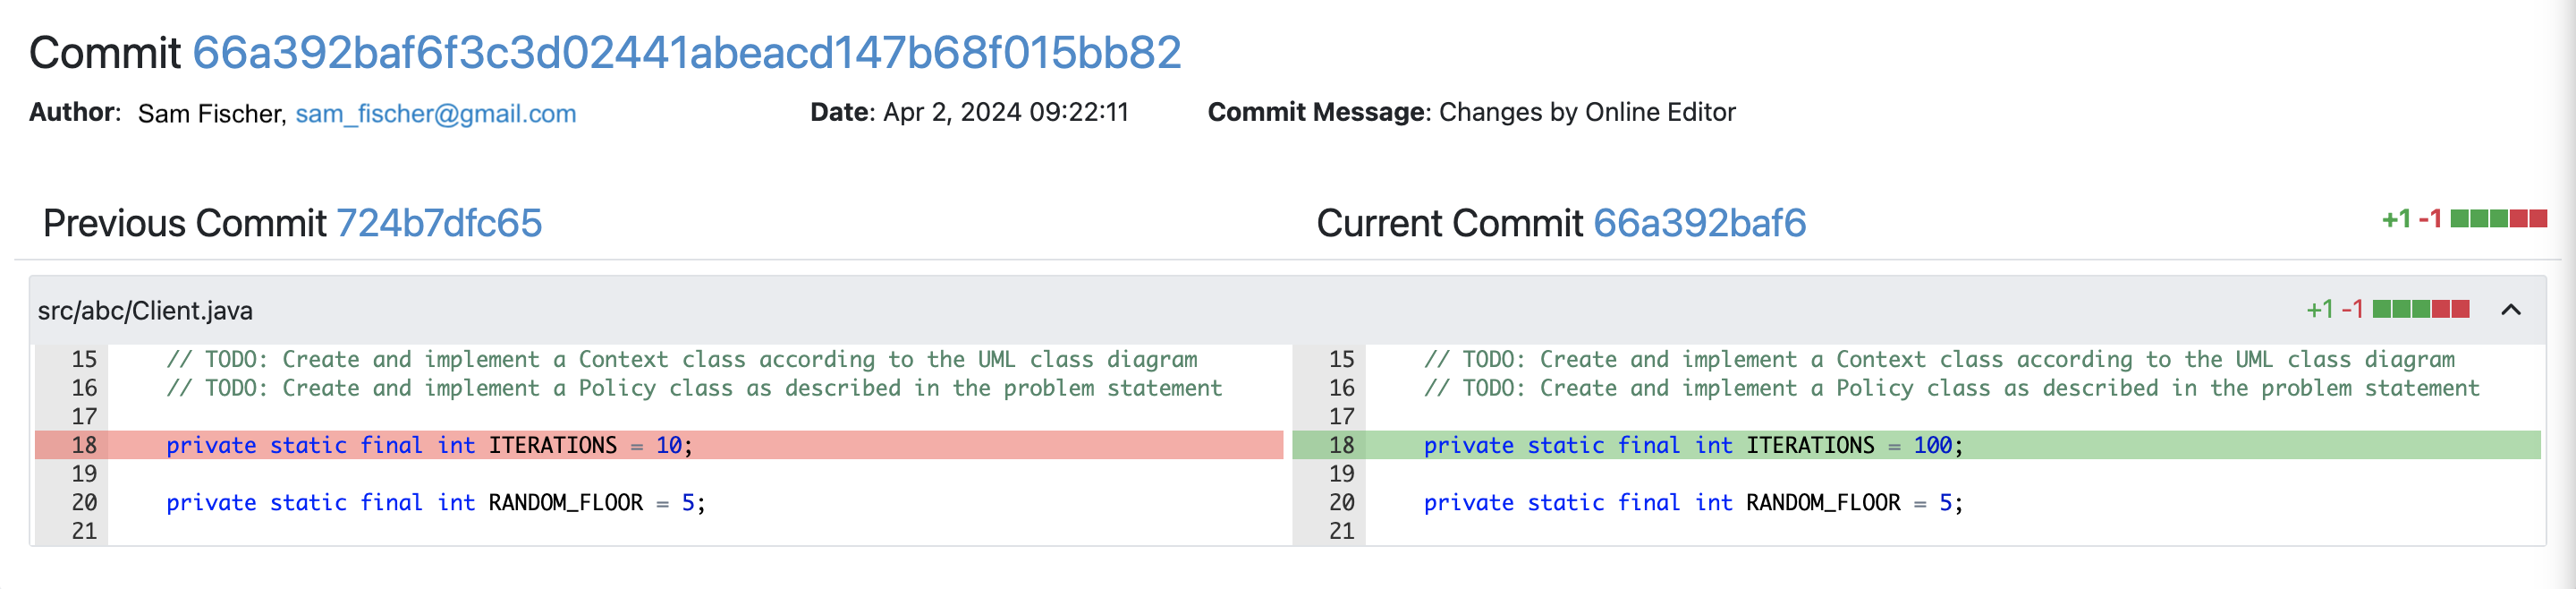
Commit Diff View
Access Repositories as an Instructor
As an instructor, you can use the repository to view the submissions of your students. For this purpose, you need to navigate to the exercise participations page.
Here you can see all the students’ participations for the exercise and navigate to the repository of a student by pressing the ‘Code’ button and clicking on .
This will show the repository of the student just like it is shown to the student.
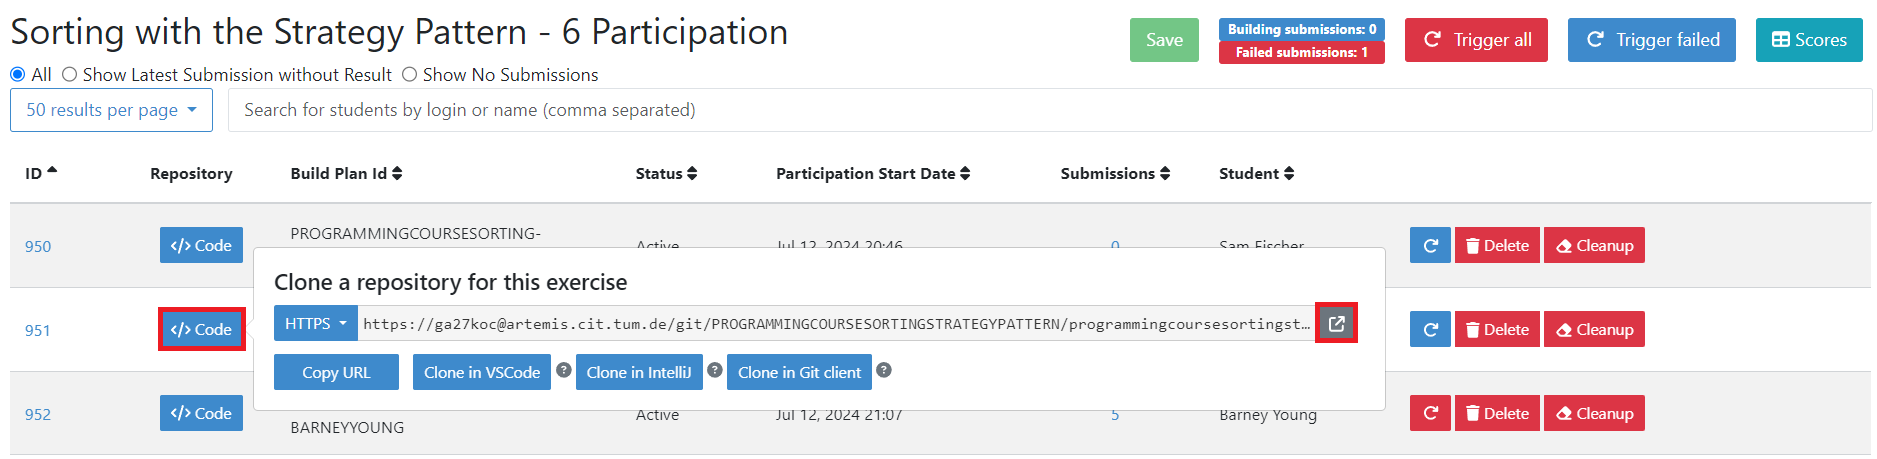
Open Repository Button in Participations Page
You can also see the repositories for an exercises solution, template and test repositories on the exercise management page.
You can navigate to these repositories by pressing the ‘Code’ button and clicking as described above.
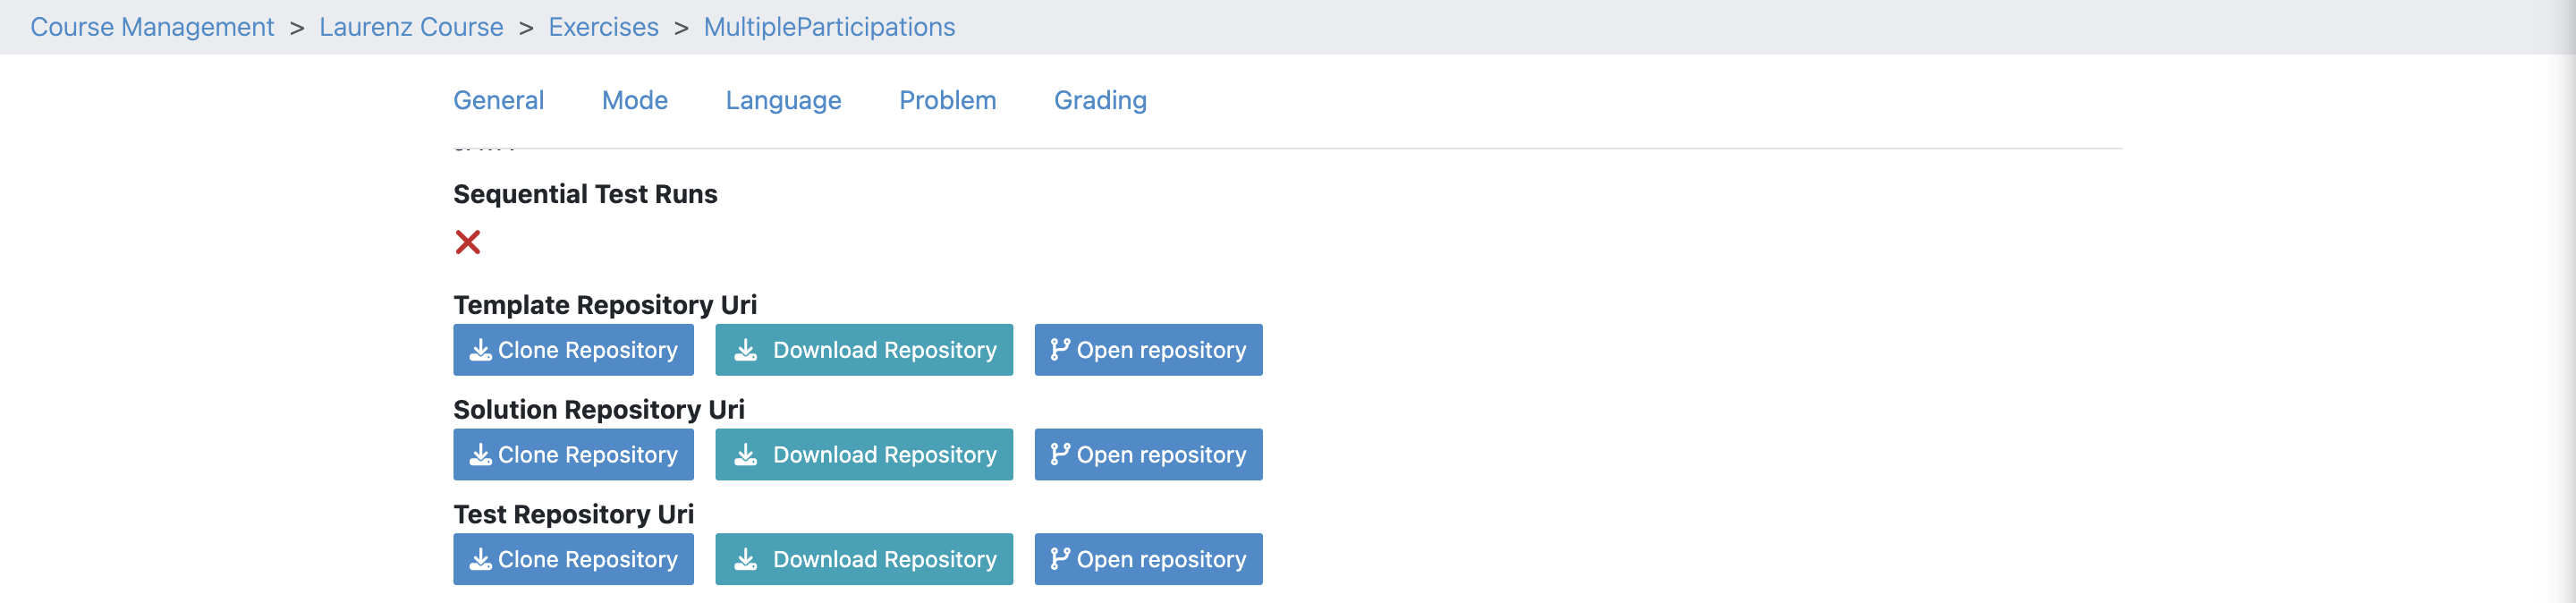
Solution, Template and Test Repositories in Exercise Management Page
Authentication Mechanisms
Artemis supports three mechanisms for authenticating to repositories: password authentication, token authentication and authentication via SSH. Admins can configure which mechanisms should be available for users, and the order in which they appear in the code button drop down, as described here.
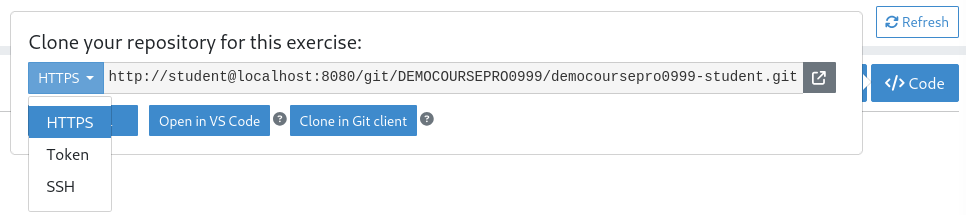
Authentication mechanism selection |
There are two types of tokens: Each student has a token, for every repository of exercises they participate in, which Artemis automatically generates and provides through the code button dialog. Instructors additionally have the ability to create an access token, with the ability to access all repositories their user account has permissions to. Find more information on repository types and access rights here. Here is a short overview on the advantages and disadvantages of the provided mechanisms:
Method |
Advantages |
Disadvantages |
|---|---|---|
Password |
|
|
User Token |
|
|
Participation Token |
|
|
SSH |
|
|
The participation token is the recommended authentication method for students due to its simplicity, security, and lack of setup requirements. While SSH provides strong security, its complexity and setup challenges may make it less convenient. Password authentication remains the default but should be used with caution — admins are encouraged to disable it when possible or enforce strong password policies to enhance security. Therefore, the generally suggested order of authentication mechanisms would ideally be: token, SSH, and lastly password.
Cloning a repository
Using the chosen mechanism, you can use Tower, git from the terminal, or any other client you like to clone your Git repository. These instructions show you how to clone your repository using Git from the terminal.
From the exercise view, click the code button to display the Clone dialog. Copy the clone URL (either the SSH format or the HTTPS, with or without token). If you are using the SSH protocol, ensure your public key is stored in your Artemis account settings and loaded on the local system to which you are cloning. From a terminal window, change to the local directory where you want to clone your repository.
Paste the link you copied from Artemis, for example:
Clone over HTTPS:
git clone https://username@artemis.tum.de/course/documentation-tests.git
Clone over HTTPS with access token:
git clone https://username:<your-access-token>@artemis.tum.de/course/documentation-tests.git
Clone over SSH:
git clone ssh://git@artemis.tum.de/course/documentation-tests.git
If the clone was successful, a new sub-directory appears on your local drive. This directory has the same name as the repository that you cloned. The clone contains the files and metadata that Git requires to maintain the changes you make to the source files.
VCS access tokens
The tokens for student repositories are automatically created, and provided to the student via the code button dialog. For every student’s exercise, Artemis automatically generates an access token, only associated with the repository of this particular exercise.
Instructors can create HTTP access tokens for repository access in Artemis. They are created in the account settings and are used in place of passwords for Git over HTTPS. You can use these to authenticate to the Artemis Local Version Control.
Warning
Never share your access tokens or commit them to version control. Treat tokens like passwords. If a token is compromised, revoke it immediately and create a new one.
Token Creation as Instructor
Go to Profile > Settings > VCS token.
Create a new token
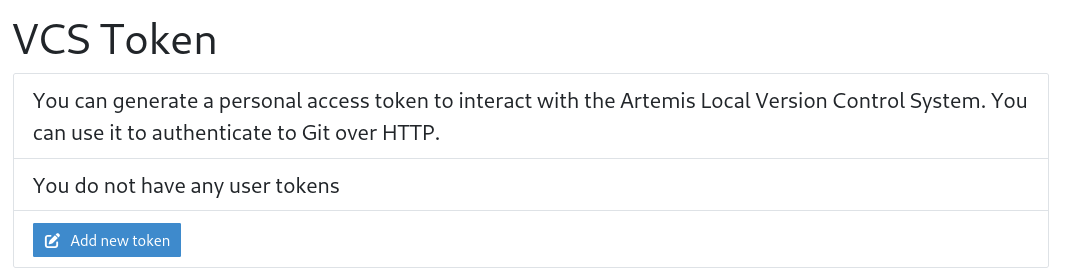
Adding a new VCS access token |
Using SSH keys to secure Git operations
Artemis provides a simple way for users to connect securely to repositories, using SSH to perform Git operations. Next is a small and basic introduction to SSH, and if you already know it, here is a guide on how to create SSH keys. If you already have an SSH key, learn how to add it to your Artemis account here.